Jicama Salad with Thai Spices

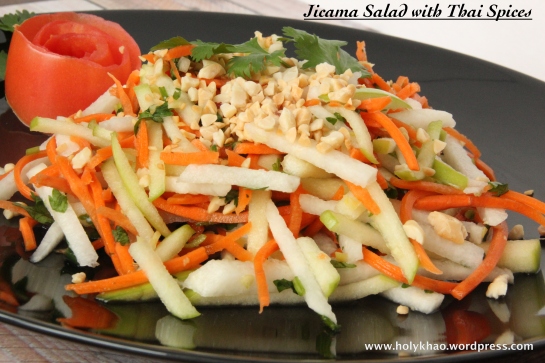
Jicama Salad with Thai Spices

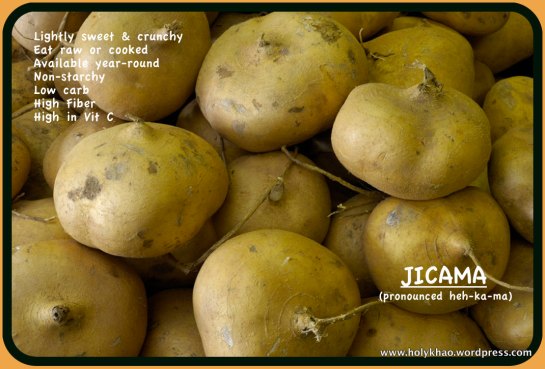
After the carb-overload from Memorial Day weekend, this salad has made a steady appearance on my plate this week. Spinach salad gets old soon, I still haven’t developed a taste for kale, and I refuse to eat lettuce! I mean – why?!?! Seriously – why?  🙂 I’d much rather eat a bowl of steamed veggies. Anyway, I generally shop at the local international supermarket, and see so many different varieties of produce. I have finally decided to try atleast one new thing each month, and hopefully make something worth sharing here. I had seen many recipes using Jicama on Pinterest, and figured it would be a good idea to make a salad or stir fry with. Originating from Mexico, this root vegetable is slightly sweet and crunchy – almost like a mix between an apple and a potato. It can be eaten raw or cooked, and does not change color or texture even after cutting and saving in the refrigerator for a few days. Turns out it is pretty inexpensive too – under $1/lb. Choose one that is firm and heavy, without any bruises or mold. To use, cut the top and bottom to level on chopping board. Then, make small slits and peel off the thin brown skin.

According to the USDA National Nutrition Database, 100 gms of jicama has only 38 calories; approx. 8 gms carbs; approx. 5 gms fiber; 20 mg Vit C. 

Jicama Info

(photo from http://bonnieplants.com)

Jicama Salad with Thai Spices

(Serves 2)

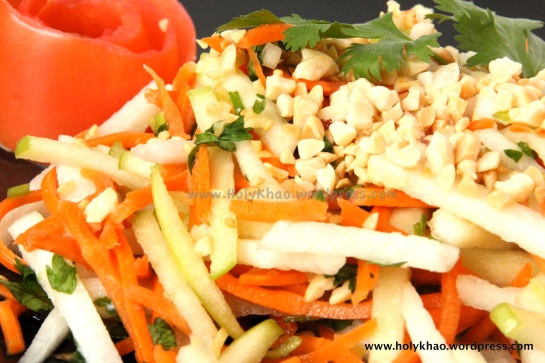
All ingredients are to taste, so I am skipping measurements. This salad is light, crunchy, and healthy. Plus, it holds its texture and color very well. I julienned a medium jicama on Monday, and it stayed the same till this afternoon (what you see in the photos). Store bought julienned carrots were used. To keep apples from browning, drop into a bowl of Sprite or any lemon-lime soda immediately after cutting and soak for a few minutes (I save the large bottles that go flat after opening for a party). Drain completely, and the apples will not darken for several hours. Alternately, you can just grate all the veggies using the larger holes in your grater.

Jicama Salad with Thai Spices

  • 1 small to medium jicama
  • 1 medium apple of choice (I used green Granny Smith as it crisp)
  • Julienned carrots
  • Finely chopped green / Thai chili
  • Finely grated ginger
  • Fish sauce (you can probably substitute soy sauce or just plain salt, but the flavor will be different)
  • Chopped Cilantro
  • Sugar (optional – about 1/2 tsp)
  • Roasted chopped peanuts (salted or unsalted)

Toss all ingredients in a bowl, and top with more roasted peanuts and cilantro.

Ooey Gooey Cake Bars

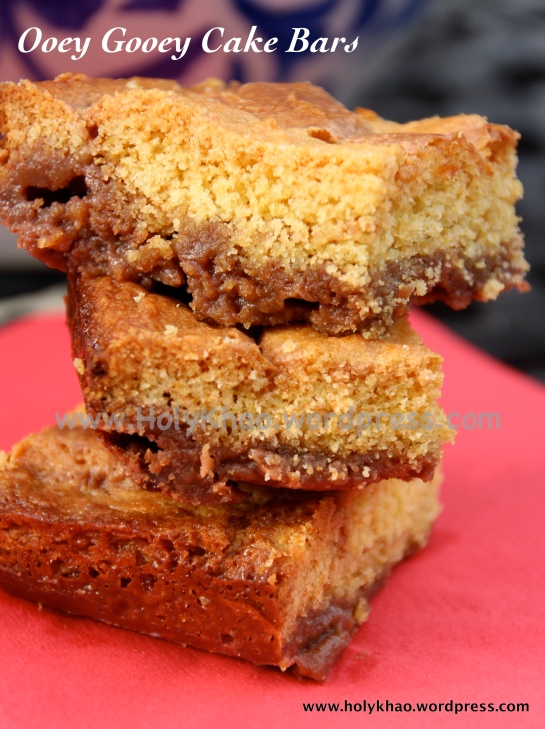
Ooey Gooey Cake Bars


Considering that grill-friendly & red-white-blue food recipes are easily available, I decided to post this dessert as an alternate option for your Memorial Day gathering. Super easy to make , it’s something you whip up in minutes, and set at the table with no further attention. Soft cake top with chocolaty, caramel bottom, these bars are one of my favorite desserts. My teenager took a big box of these cake bars to school and he said his friends ‘attacked’ it before the morning bell. His words: “The bars are awesome because you’re awesome mom”. Teenage sarcasm ignored and brownie points banked :)).

Ooey Gooey Cake Bars

(9 X 13 pan – 24 squares)

  • 1 box (16.25oz – 18.5 oz) yellow or white cake mix – any brand
  • 2 large eggs – room temperature
  • 1/3 cup vegetable oil
  • 1 can (12oz – 14oz) sweetened condensed milk
  • 1 cup semi-sweet chocolate chips
  • 4 Tbsp (1/2 stick) butter – room temperature

1) Preheat oven to 350* F.

2) Grease a 9 X 13 pan and set aside.

3) In a large bowl, beat together the cake mix, eggs and oil till well incorporated.

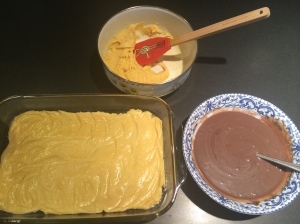
4) Press two-thirds of the mixture onto the bottom of the greased pan and flatten gently.

photo-1


5) In another bowl, microwave the chocolate chips, condensed milk and butter for about a minute. Mix well and stir to ensure it is completely melted.

6) Pour over the cake mix in the 9 X 13 pan and spread gently to the corners if required.

7) Drop the remaining cake batter on top of the chocolate mixture.


Ooey Gooey Cake Bars

8) Bake 28-30 minutes, or till toothpick inserted in center comes out clean.

9) Cool completely and cut into 24 pieces.

Ooey Gooey Cake Bars

10) This is a great recipe to make with kids, and is always a hit at bake sales.

(Sorry for the bad step-by-step photos. I noticed that my regular camera was out of charge after I had started to mix everything, and I had to rely on my phone for photography.)


Parsi Eggplant Pickles

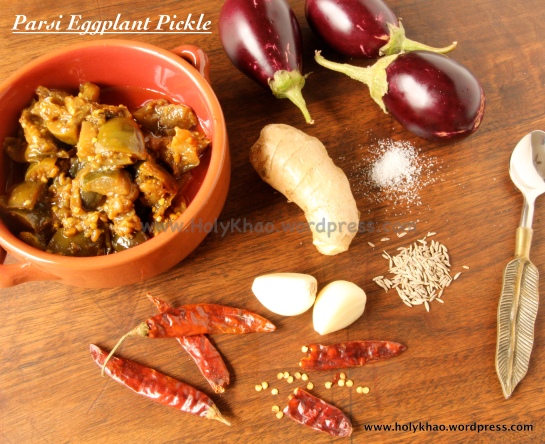
Parsi Eggplant Pickle


The name Parsi means “Persian”  or “from Persia”. Parsis are followers of the Iranian prophet Zoroaster, and followed Zoroastrianism – the dominant religion of the Iranian region in the 8th century. They emigrated to India around the 8th – 10th century to avoid religious persecution from Muslim invaders, settling primarily along India’s western coast city of Bombay (now called as Mumbai). The Parsi community also flourished in Bangalore (Karnataka) and in Karachi (Pakistan). They eventually made a name for themselves not only as prominent officials in the British East India Company, but also as savvy businessmen, prolific artists, and charitable givers. Legend has it that when the first Parsis landed in India, the King of Gujrat was reluctant to allow them to stay, saying that he was concerned about his already overpopulated kingdom. The leader of the Parsi group requested for a bowl of milk and sugar, and when presented it, stirred the sugar into the milk, saying they (Parsis) would only make what was already in place sweeter.

Parsi cuisine is a blend of aromatic rice, lentils, meat, potatoes, and vegetables. It blends middle-Eastern style of cooking with the spices of India. Some of their famous dishes include Dhansak (a blend of several varieties of lentils, vegetables and meat cubes), Sali Murghi (chicken with matchstick potatoes), and Patra ni Macchi (banana-leaf wrapped fish). And, which Indian does not know about Faluda?!?! A tall glass of this summertime treat is filled with tapioca, vermicelli, ice cream, jello and cold rose syrup. Yum!!

I came across this eggplant pickle recipe on hungry tigress a few months ago, and made a half-batch. Though it looks like a long list of ingredients and elaborate method, it is actually easy to  make. It tastes great with chapati, any rice dish, and even as a sandwich/pita filling. Let me know what you think if you make it. I would love to hear back.


Parsi Eggplant Pickle

(adapted from hungry tigress)

(Makes about 8 cups = approx. 2 spaghetti sauce jars full)

  • 1 cup oil
  • 1 tsp fenugreek seeds (methi)
  • 2 tsp cumin seeds (jeera)
  • 2 tsp fennel seeds (saunf)
  • 6 large garlic cloves (thinly sliced)
  • 2-inch ginger (minced)
  • 1/2 cup fresh green chillies (slit)
  • 2 Tbsp chili powder (or to taste)
  • 1 tsp turmeric powder
  • 2 1/2 lbs eggplant of choice
  • 1 cup white wine vinegar
  • 1/3 cup brown sugar (OR) jaggery
  • 1 1/2 – 2 Tbsp salt ( or to taste)

1) Wash and dry the eggplants. Cube into 1-inch pieces, leaving the skin intact.

2) Measure out all the other ingredients and have them ready.

3) In a wide cooking pot, heat the oil on medium high till very hot, but not smoking.

4) Slightly reduce the heat, and drop in the fenugreek, cumin and fennel seeds one after the other. Let them sizzle for about 30 seconds, but make sure they stay light golden brown, not dark brown.

5) Next, add the ginger & garlic and saute till light golden.

6) Turn up the heat again for a few seconds, and then add the slit green chillies. Hold a plate between you & the bowl so the popping chilies do not splatter onto your face. Let the chilies sizzle till they turn whitish-gray.

7) Add the chili powder & turmeric and saute till aromatic, about 20 seconds.

8) Drop in the eggplant, vinegar & sugar; mix well and bring it to a boil on high.

9) Reduce the heat and simmer for about 30-45 minutes (uncovered).

10) As with any Indian pickle, cook till the oil floats on top, signaling that the pickles are done.

11) Cool and bottle***. Can be refrigerated up to a year, if oil^^^ covers the top of the eggplants.

*** Make sure that the glass bottles and lids you use are completely clean and completely dry***.

^^^ If you don’t plan on keeping this for long, you could probably reduce the oil by a third and still have a delicious condiment. Please leave me a comment and let me if you do try it. Thanks.^^^


Cupcake Bouquet

Mother’s Day is around the corner, and I am so excited about writing my first Feature Post. I have come across many enterprising and inspiring women who balance both family and career, and are able to take the plunge to pursue their passion. This post is the first of (hopefully) many more where I can give a shout out to these wonderful ladies (and men), and spread word of their work.

Today, I am writing about CUPCAKE DELIGHTS by Hannah Jaikumar. Hanna (and her twin sister Nandini) and I went to college together, but we had lost track of each other over the years. Thanks to Facebook, we were able to reconnect a few years ago, and catch up again. Going through her photos, I was simply amazed by her baking talent. When I found out that this mother of 2 young children works full time, and runs her baking business, I felt that I had to encourage her endeavor. I’ve shared a small sample of her beautiful creations here.

Hannah's Cakes


Here’s a small write up about her:

ABOUT MYSELF…
Hi, I’m Hannah Jaikumar, living in Brampton, On, Canada. I am a Realtor by profession for the past 10 years, but baking/cooking has always been my passion. No matter how busy I am, I always find the time and energy to bake.

HOW DID I GET INTERESTED IN BAKING…..
My cooking skills definitely are acquired from my mom Irene who is a great cook and my inspiration. I remember when I was 6-years old, my mom had baked “Vanilla Buns” during summer vacation in Delhi, India where I grew up for the first few years. The kitchen was filled with the aroma of vanilla, and the pan was a beautiful diamond shape. I still have the pan as a keepsake. The Vanilla Buns project stayed in my memory since then and eventually got me interested in baking.
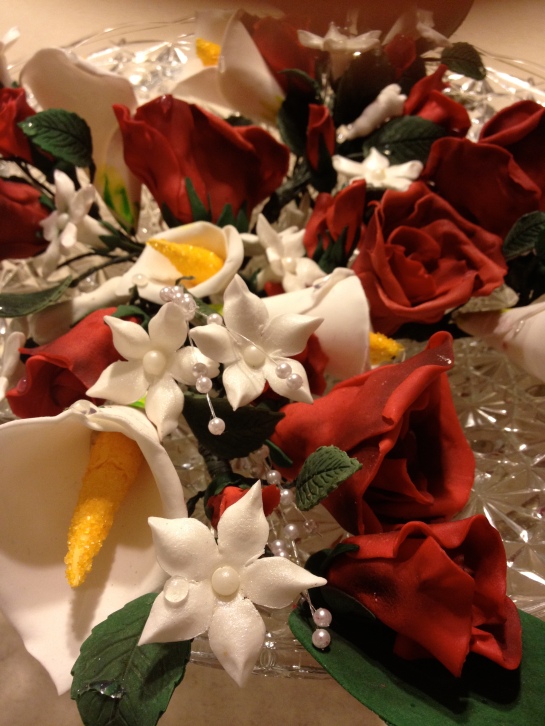
Cakes By Hannah

(Edible Sugar-paste Flowers)

WHAT IS A TYPICAL DAY LIKE….
I usually measure/weigh the ingredients, and get icing bags with appropriate nozzles ready the previous night. The next morning, while the first batch is in the oven, I get the batter ready for the 2nd batch, and all the baking is done back to back. While the cakes are cooling, I get the frosting ready according to the orders placed. I prepare a basic frosting, divide it into portions, and vary the flavors with additions of extracts or fruit pulps.

My family has always supported me a lot, be it tasting tirelessly by being guinea pigs or helping me in other ways. My husband Seraphim takes care of the home front, while our 11-year old daughter Rishona keeps our 3-year old Rivka entertained. Last but not the least, thanks to my twin sister Nandini who patiently listens to all my baking ideas and stories, and gives me valuable feedback.

TELL US ABOUT YOUR BUSINESS….
I’ve always dreamt of starting a baking business. I started on a large scale for the first time in the spring of 2010 to raise funds for the SICK KIDS HOSPITAL in Toronto. It was the first “BAKE SALE & LEMONADE STAND” organized by my daughter Rishona. I baked 700 chocolate chip cookies in 2 days while being 5-months pregnant with our second daughter. Rishona has since continued her fundraising every year till date. Over the years I have been treating family, friends, neighbors, my daughter’s school teachers, doctors office, school custodian, school bus operator, grocery store employees, and my hair dresser to name a few.

Currently, I take orders for CUPCAKES where the flavors & frosting can be customized to suit the customer’s taste. My other speciality is over 25 custom made flavors of BISCOTTI.


CONTACT INFO…..

I live about 50 kms from Toronto and cater to orders from in and around the city. All orders are to be picked up.

CUPCAKE DELIGHTS BY HANNAH

Phone: (416) 268-5307


CUPCAKE BOUQUET

Cupcake Bouquet

A cupcake bouquet would be a lovely gift for any occasion – Birthday, Anniversary, Mother’s/Father’s/Grandparent’s Day, Thanksgiving, Christmas, Baby / Bridal shower, Thank You, Congratulations, etc.

With Mother’s Day just around the corner, this might be the sweetest homemade gift that mom ever received.

Hannah Jaikumar from CUPCAKE DELIGHTS by Hannah was kind enough to share her method for these beautiful arrangements.


MATERIALS REQUIRED

Clay/Ceramic Pot or Vase – 6-inches in diameter

Pebbles to fill inside the pot

Styrofoam Ball – 6-inches in circumference

Glue gun

Tooth picks

Green tissue paper – 1 sheet (cut into 6-inch X 1-inch strips)
Fancy fabric ribbon-2-inches wide (Make a fancy bow separately.)

Cellophane wrap (optional)

13 to 18 large cupcakes [OR] 20 to 26 Medium cupcakes [OR] 30 to 36 Mini cupcakes

Butter cream frosting

Pastry bag

Icing tip of your choice according to the flower to be piped


Method

1)    Bake, cool and ice your cupcakes according to the flower of your choice, e.g. Roses or hydrangeas. Alternately, you can use store bought cupcakes.

(I prefer to refrigerate the iced cupcakes for 4-6 hours to firm up the icing for easy handling.)

Cupcake Bouquet

2)    Fill the pot/vase with pebbles to weigh the container down.

3)    Glue the Styrofoam ball with hot glue to hold it firmly in place.

Cupcake Bouquet

4)    Wrap the ribbon around the edge of the pot and glue at the joining. Glue the already made bow on to the front of the pot.

036

5)    Keeping the bow as the front of the arrangement, insert 2 toothpicks, about 1-inch apart per cupcake. Make sure it is at a 45 degree angle, otherwise the icing will fall off or the cupcake will loosen from the paper cup.

Cupcake Bouquet

Cupcake Bouquet


6)    Place a cupcake snuggly on to the tooth picks, right in the centre. Continue by positioning 2 toothpicks per cupcake until the bottom row is complete. Adjust the tooth picks to ensure that the cupcakes are close to each other. You might have to remove and re- insert the toothpicks a few times. You can fit about 8 to 10 large cupcakes in the bottom row for a 6-inch pot and 6-inch Styrofoam ball. Move on to the next row with the same 2 toothpicks per cupcake pattern. The middle row will hold about 4-6 large cupcakes. The top will hold 1 large cupcake.

Cupcake Bouquet

7)    If using tissue paper, cut 1-inch by  6-inch strips. Fold the strips in accordion style. Carefully insert tissue paper in-between cupcakes, making sure not to touch or smudge the icing. Another easy trick is to use a pair of forceps/tweezers to insert the tissue paper. If using edible leaves follow the same procedure. Cover as much as you can so that no white Styrofoam ball is seen from the outside.
062

 Cupcake Bouquet


8)    Cut a large size cellophane wrap. Place the bouquet in the center and carefully gather the cellophane wrap together. Tie a ribbon just enough to loosely hold the bouquet. I usually like to give the bouquet with a few extra cupcakes just incase 1 or 2 fall off the arrangement and can be replaced at the venue.

Cupcake Bouquet


YOUR CUPCAKE BOUQUET IS READY TO BE DELIVERED


Vegetarian Pinto Beans for Burrito Bowl or Tortilla Salad

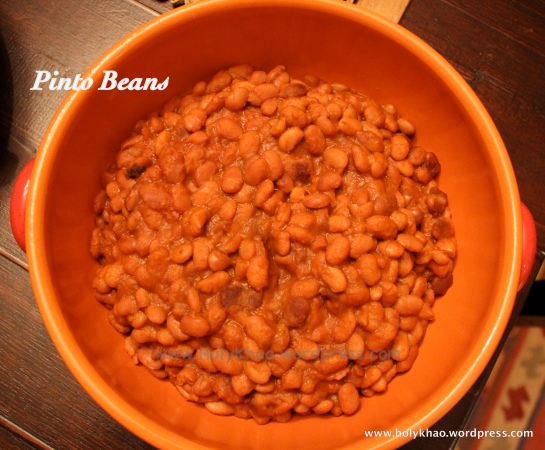
Pinto Beans


Serve these beans as an option alongside Mexican-style black beans, tofu sofrito, cilantro-lime rice, and salsa chicken when you want a Homemade Chipotle-style Buffet & Tortilla Salad (Lots of Vegetarian Options). It can be made ahead and heated at the time of serving. Leftovers freeze beautifully, and I’ve had it without any accompaniments as a hearty chilli. Adjust the spice levels to suit your tastes – this version is medium spiced.

Vegetarian Pinto Beans for Burrito Bowl or Tortilla Salad

(Serves 12-15)

  • 1 lb dry pinto beans *** (picked, rinsed, soaked in water overnight)
  • 3 Tbsp oil
  • 1 large onion, chopped
  • 4-5 cloves garlic, chopped fine OR (1 Tbsp paste)
  • 2 tsp cumin powder
  • 1 (15 oz) tomato sauce
  • 3/4 cup taco seasoning (or to taste)
  • 3 cups water
  • salt to taste

1) Discard the soaking water and rinse the pinto beans well. Drain and set aside.

2) In a large stockpot, heat the oil on medium-high.

3) Saute garlic, then onion for a few minutes till fragrant and just starting to brown.

4) Add cumin powder and stir for a few seconds.

5) Add the pinto beans, taco seasoning, tomato sauce and salt. Mix well.

6) Bring to a boil, then reduce flame and simmer for about 1 1/2 hours uncovered, stirring occasionally.

7) The beans should neither be dry or runny. Add more water or broth is it looks too dry, or cook uncovered for longer on a higher flame if it seems too runny.

8) Check beans for doneness, and adjust seasoning.


***NOTE: You can substitute 4 (15 oz) cans of pinto beans for 1 lb dry. Drain 2 cans and reserve the liquid. Follow recipe as stated above by using 2 cans undrained & the beans from the drained cans too. Cook according to above instructions, but reduce time to 30-40 minutes. If you need more liquid, then use what was reserved from the cans. Or simply rinse out all beans, and use about 2-3 cups of water / broth.

Chipotle-style Cilantro Lime Rice (Vegetarian)

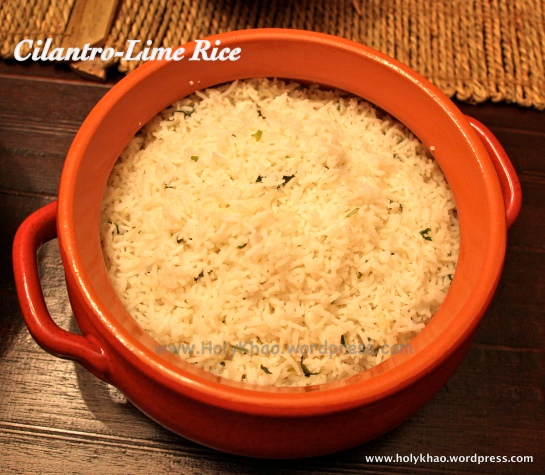
Cilantro Lime Rice

This is an easy and mild recipe that you can serve with a Mexican or Tex-Mex style dinner. I made this for my Homemade Chipotle-Style Buffet & Tortilla Salad (Lots of Vegetarian Options) for an informal gathering at our house a while back. (The photo is pathetic, but the taste was delicious!).

Chipotle-style Cilantro Lime Rice

(Serves 12-15)

This recipe scales well, so feel free to reduce or increase proportions as necessary. I have listed a large quantity as I served a dinner party.

For a family size meal (2 adults + 2 kids), 1 cup of rice might be enough.

  • 3 cups long grain rice (eg: basmati)
  • 5-1/2 cups water
  • 2 – 3 tsp salt (to taste)
  • 2 – 3 medium limes (juiced)
  • 1/2 cup chopped cilantro
  • 1/2 stick butter (or scant 1/4 cup oil)

1) Rinse the rice with cold water and drain completely.

2) In a medium saucepan with lid, mix rice, salt and water, and bring to a boil on medium-high.

3) Once it comes to a boil, stir once, cover and reduce heat to minimum.

4) Allow to cook undisturbed for about 15 minutes. Open the lid and fluff the top layer gently with a fork, and cover quickly. Turn off the heat and allow the rice to rest for 5-10 minutes.

5) Add butter, cilantro & lime juice to taste. Adjust salt as needed. Mix well and serve.

I served this with a Homemade Chipotle-Style Tortilla Salad with beans, tofu and chicken options.