Quinoa Breakfast Bars

Quinoa Breakfast Bars

How many of you spent the summer with kids who were constantly eating – because they were starving after hours at the pool, because their friends were over and wanted a snack, they wanted to try a new concoction, or they were just plain bored because you took away their electronics? My kids had more than their fill of junk food over the last few months, and there was not much I could do about it when extended family visiting for a few months and there was constant entertaining.

Quinoa Breakfast Bars

Fast forward to mid-August: the guests leave and my college bound child – who is suddenly on a gym routine – announces that he needs lots more protein than he gets at home! The 11-year old on a growth spurt eats like there’s no tomorrow. Husband says he’d like to take something from home to keep the 3p.m. vending machine run at bay. I just want something that can be eaten without utensils and feels like a treat but is also healthy for my family. These Quinoa Bars to the rescue! I made these the first time without any recipe, and you can do the same too. The amounts and ingredients below are just a guide (as are many of my other recipes). Feel free to substitute what you have on hand and adjust quantities to suit your taste. For example, add coconut flakes if you like the taste. Substitute almonds with walnuts (or mix a little of both!). Replace cranberries with cherries or even raisins if that’s what you have on hand. I’ve used a whole 15 oz bag of milk chocolate chips but you could reduce it or switch it up with dark / semi-sweet / white chocolate.

With school back in session and after school events looming around the corner, breakfast and grab-and-go snacks that are easy, tasty and good for you are a blessing. These bars keeps for a couple of weeks in the refrigerator.

Quinoa Breakfast Bars

(Makes 16 bars 2-inch X 2-inch bars)

  • 1 cup quinoa
  • 1/2 cup dates (chopped)
  • 1/2 cup figs (chopped)
  • 2 tbsp flax seeds
  • 2 tbsp chia seeds
  • 1/2 cup almonds (or walnuts) – chopped
  • 1/2 cup cranberries (or cherries / tart raisins)
  • 1/2 cup pumpkin seeds (or sunflower seeds)
  • 1-2 tbsp coconut oil
  • 2 cups chocolate chips of choice
  1. In a heavy bottom pan, lightly toast the quinoa over medium flame for few minutes. It will pop and lightly puff. Remove from heat & cool completely. (Do not brown.) – I feel this removes the slight bitter taste, but feel free to use raw if that’s what you prefer. 
  2. In a heavy duty food processor, add the dates, figs and coconut oil and pulse till it becomes finely processed.
  3. Add the cooled quinoa, flax, chia, almonds and half of the cranberries & pumpkin seeds. Pulse until all the ingredients are finely chopped and mixed well.
  4. Line an 8X8 pan with wax paper and press the mixture into the pan. Level the top using the back of a flat spoon or dish.
  5. Melt chocolate chips according to package directions and pour evenly over the mixture and spread.
  6. Set in the refrigerator for an hour or so to set and firm up. Cut into 16 pieces. The bars keep for atleast 2 weeks in the refrigerator.

Click here for recipes for No-Cook Oats & Dates Breakfast Bars and No Bake Oatmeal Peanut Butter Bars

No-Cook Oats & Dates Breakfast Bars

No-cook Oats & Dates Breakfast Bars

Have you spent enough already on snack / granola/ energy / breakfast bars? One – the $$ add up pretty quickly; two – have you turned to the ingredients list? Yes – they may be low in sugar & carbs, high in protein & fiber, and claim to be a good meal replacement. But most of them are chock full of additives & have dozens of ingredients that I would never put in my mouth if I saw it by itself. In my attempt to feed my family food that is tasty, nutritious, natural and most importantly,  can be made ahead, I have been experimenting with a few different recipes.

I found that over the last few months, the alternative to my 4pm sweet tooth / chocolate craving was only satiated by the texture and sweetness of dates and the crunch of a few walnuts or almonds. If that was not enough, I would eat an apple or a banana to tide me through till dinner. Some days, I needed a ‘portable’ breakfast & cereal bars seemed like a good thing to start the day with.

These bars are husband & kid approved, and I generally don’t flinch when my boys go back for a second piece. The recipe below is more of a guide  – feel free to swap out ingredients for what you have on hand and adjust sweetness to your preference.

No-Cook Oats & Dates Breakfast Bars

(Makes 16 – 2X2 inch squares)

  • 2 cups nuts (walnuts, pecans, almonds, etc)
  • 2 cups oats ( I used rolled / old-fashioned oats; can probably try Instant / quick cook variety)
  • 1 cup dates
  • 1 cup dry figs (soak in 1/2 cup warm water for about 15 mins and drain well before using)
  • 1/4 cup chia seeds (optional)
  • 2-3 tsp cinnamon OR cardamom powder
  • few Tbsp honey OR maple syrup OR agave syrup (optional)
  • 1-2 cups applesauce OR finely chopped apple OR banana

1) Heat a wide, heavy bottomed pan on medium-high flame and add the oats. Toast them for about 5-10 mins till they are nutty, stirring constantly and making sure they do not brown. Remove to another wide container to cool.

2) In the same pan, add the nuts in a single layer and toast for a few minutes, again stirring continuously and making sure they do not burn. Toast till they are fragrant and glossy with their own oil. Remove from hot pan to cool completely. Work in batches if necessary.

3) In a large food processor, add the oats, the nuts and the dates & figs separately. Process till coarsely (your preference) chopped, removing to another container as each one is done.

4) Add the cinnamon/cardamom powder and fruit and mix well. – If using applesauce, use only 1/2 – 1 cup to bind mixture, and add on as needed.

5) Alternately, add all the coarsely chopped ingredients and powder back to the food processor and pulse till it all comes together. (This is my preferred method as we don’t like chunks in our bars.) Drizzle in some honey/syrup if needed as everything is getting mixed.

6) Line an 8X8 inch pan with wax paper or foil, making sure it overhangs over the sides.

7) Press the mixture into the pan, and smooth out the top evenly.

8) At this point, the bars are ready to eat. I prefer to let the raw mixture stand overnight in the refrigerator to set and allow the flavors to meld. 

9) When the mixture is set, remove the bars by holding the foil. Slice into 2X2 inch squares and store in an airtight container. They will be fine for a week or more in the fridge.

10) Alternately, once you press the mixture into the pan, cook in a preheated 350* oven for 20 minutes and allow to cool completely. Remove with foil, slice and store in an airtight container.

NOTE: As mentioned above, add or reduce the quantity of the dates, fruits and syrup to suit your tastes. You can also experiment with different types of nuts, although I find that walnuts have the best texture here.

An Indian Holiday Feast

Hope everybody had a great Thanksgiving break. It’s the start of the season of over-indulgence! Thanksgiving weekend was filled with good food, drinks, family, friends, shopping, gossip & spending time with three precious little nieces. While we have the traditional meal with all the accompaniments each year, I’ve never really been a fan of turkey. I had seen recipes for (east)Indian spiced turkey several times, and had also been meaning to try roasting a cornish hen for several years. I decided to try to meld both together and improvised along the way. The results were a delicious & colorful meal that worked for our taste buds :). And it was easy enough to make for a weeknight meal.

Tandoori Cornish Hen

The menu included:

For dessert, we had warm and sweet Gulab Jamoons 🙂

[Scroll down for recipes of items that are not hyperlinked.]

Tandoori Cornish Hen

Masala Corn

  • 1 cup corn kernels (cooked and drained) – I buy frozen roasted corn kernels from Trader Joe’s
  • 1 Tbsp butter
  • 1/2 tsp red chilli powder
  • 1 tsp chaat masala
  • salt to taste (use black salt / kala namak if available for a better flavor)
  • 1-2 tsp lemon juice
  • cilantro for garnish

Mix all ingredients well and serve. The measurements are just a guide – adjust as per your taste.

 Peas & Carrot Pulao

  • 1 cup basmati rice
  • 2 Tbsp oil
  • 1 tsp cumin seeds
  • 1 small onion – sliced
  • 1/2 tbsp ginger
  • 1/2 tsp green chilli paste (or 1 green chilli – slit)
  • 1/4 cup peas
  • 1/4 cup diced carrots
  • 1/2 tsp salt to taste

1) Heat oil in a medium pan and add the cumin seeds. Allow it to sizzle and pop for a few seconds.

2) Add the onion, ginger and green chilli. Saute on medium-high till translucent, stirring often.

3) Add the carrots and salt, and saute for 2 minutes.

4) Add the peas and cook for another 2 minutes.

5) Add the rice and saute for 1-2 minutes till it changes color.

6) Add 1 1/2 cups (one and a half) water and bring to boil.

7) As soon as the water comes to boil, stir once, reduce heat to LOW, and cook covered for about 12-15 minutes. Do not open the lid during this time. At end of cook time, open lid and gently fluff the rice with a spoon or fork. Check for doneness. Keep covered till ready to serve.

Raita

This recipe was given to me by my friend Sandhya’s mom and it is my most favorite raita recipe.

  • 1/2 medium grated cucumber
  • 1 cup greek yogurt / strained yogurt
  • 1 tsp cumin seeds
  • 1 small dry red chilli
  • 2 Tbsp grated coconut
  • salt to taste

1) Wash, peel & grate the cucumber and drain for a few minutes.

2) In a small blender bowl, add half the yogurt, cumin, chilli & coconut and blend till smooth.

3) Mix all ingredients together and salt to taste.

NOTE: If you use regular yogurt, squeeze out the water from the cucumber before mixing in.

Sapota Phirni & Sabudana Cutlets = Perfect snack for a cool fall evening

Sapota Phirni

Fall!!! My favorite season of the year. Everything around is fresh and crisp and clean. I love the cool breeze, the vibrant colors on the trees, hot chai, the holidays around the corner (that brings with it it’s own madness, but in my mind’s eye, everything is perfect & organized :)). As the weather starts to cool down, I have had hankerings for fried, starchy, savory snacks for the last few days. Not to mention that everywhere I turn (maybe I should say, click), I see Navratri recipes, with sabudana vada being the most posted. A friend of mine makes the best ones that stay crisp even after they cool – stay tuned for her recipe here soon. In the meantime, I wanted to make a quick and lighter version. Incidentally, a bag of frozen sapota that I had bought on an impulse kept staring at me for the last few weeks, and I figured Sapota Phirni would be an interesting accompaniment to the vadas. I figured that my Almond Phirni method would work here too. While I did have reservations about how it would taste, let me just say that they both turned out well.

Sapota Phirni

(Serves 4-5)

  • 2 cups milk
  • 2 1/2 Tbsp rice flour
  • 1/4 cup sugar
  • 2 cups sapota puree (fresh or frozen) – I used a bag of the frozen fruit
  • pinch of cardamom powder
  • pinch of saffron strands (optional)
  • roasted nuts & raisins (optional)

1) In a small bowl, stir together the rice flour and 1/2 cup milk, making sure there are no lumps. Set aside.

2) In a medium bowl, heat the remaining 1 1/2 cups milk and sugar on medium till it comes to a boil.

3) Reduce the heat, and slowly pour in the rice flour mixture, stirring vigorously to make sure that no lumps form.

4) Add the cardamom powder and saffron, and simmer for 5-7 minutes.

5) Stir in the sapota puree and simmer 1 minute.

6) Remove from heat and cool  to room temperature, or chill.

7) Top with roasted and chopped nuts and raisins before serving (optional).

Sabudana Cutlets

Sabudana Cutlets

(Makes about 15-17)

  • 1 cup sabudana
  • 2 large potatoes (boiled, peeled & mashed)
  • 3-4 green chillies (finely chopped)
  • 2 tsp ginger paste
  • 2-3 Tbsp cilantro (finely chopped)
  • 1 tsp cumin (jeera) seeds
  • salt to taste
  • Oil for pan frying

1) Rinse and soak the sabudana in water for 4-5 hours or overnight (each batch varies in how quickly it softens; when ready to use, the sabudana must be easily squished between your fingers).

2) Drain the sabudana well in a colander, and make sure it does not have excess water.

3) Add all the ingredients to a large bowl and mix well. Shape into small balls, about golf ball size.

4) Heat a griddle on medium heat and spread a teaspoon of oil on it.

5) Flatten the potato balls on your palms and shape into a disc. Place on the hot griddle and cook both sides on medium heat till golden brown.

Cupcake Bouquet

Mother’s Day is around the corner, and I am so excited about writing my first Feature Post. I have come across many enterprising and inspiring women who balance both family and career, and are able to take the plunge to pursue their passion. This post is the first of (hopefully) many more where I can give a shout out to these wonderful ladies (and men), and spread word of their work.

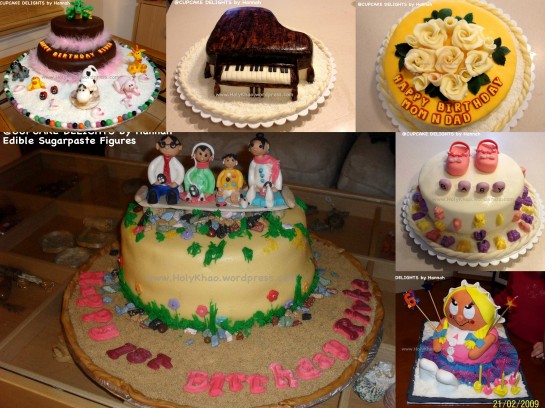
Today, I am writing about CUPCAKE DELIGHTS by Hannah Jaikumar. Hanna (and her twin sister Nandini) and I went to college together, but we had lost track of each other over the years. Thanks to Facebook, we were able to reconnect a few years ago, and catch up again. Going through her photos, I was simply amazed by her baking talent. When I found out that this mother of 2 young children works full time, and runs her baking business, I felt that I had to encourage her endeavor. I’ve shared a small sample of her beautiful creations here.

Hannah's Cakes


Here’s a small write up about her:

ABOUT MYSELF…
Hi, I’m Hannah Jaikumar, living in Brampton, On, Canada. I am a Realtor by profession for the past 10 years, but baking/cooking has always been my passion. No matter how busy I am, I always find the time and energy to bake.

HOW DID I GET INTERESTED IN BAKING…..
My cooking skills definitely are acquired from my mom Irene who is a great cook and my inspiration. I remember when I was 6-years old, my mom had baked “Vanilla Buns” during summer vacation in Delhi, India where I grew up for the first few years. The kitchen was filled with the aroma of vanilla, and the pan was a beautiful diamond shape. I still have the pan as a keepsake. The Vanilla Buns project stayed in my memory since then and eventually got me interested in baking.

Cakes By Hannah

(Edible Sugar-paste Flowers)

WHAT IS A TYPICAL DAY LIKE….
I usually measure/weigh the ingredients, and get icing bags with appropriate nozzles ready the previous night. The next morning, while the first batch is in the oven, I get the batter ready for the 2nd batch, and all the baking is done back to back. While the cakes are cooling, I get the frosting ready according to the orders placed. I prepare a basic frosting, divide it into portions, and vary the flavors with additions of extracts or fruit pulps.

My family has always supported me a lot, be it tasting tirelessly by being guinea pigs or helping me in other ways. My husband Seraphim takes care of the home front, while our 11-year old daughter Rishona keeps our 3-year old Rivka entertained. Last but not the least, thanks to my twin sister Nandini who patiently listens to all my baking ideas and stories, and gives me valuable feedback.

TELL US ABOUT YOUR BUSINESS….
I’ve always dreamt of starting a baking business. I started on a large scale for the first time in the spring of 2010 to raise funds for the SICK KIDS HOSPITAL in Toronto. It was the first “BAKE SALE & LEMONADE STAND” organized by my daughter Rishona. I baked 700 chocolate chip cookies in 2 days while being 5-months pregnant with our second daughter. Rishona has since continued her fundraising every year till date. Over the years I have been treating family, friends, neighbors, my daughter’s school teachers, doctors office, school custodian, school bus operator, grocery store employees, and my hair dresser to name a few.

Currently, I take orders for CUPCAKES where the flavors & frosting can be customized to suit the customer’s taste. My other speciality is over 25 custom made flavors of BISCOTTI.


CONTACT INFO…..

I live about 50 kms from Toronto and cater to orders from in and around the city. All orders are to be picked up.

CUPCAKE DELIGHTS BY HANNAH

Phone: (416) 268-5307
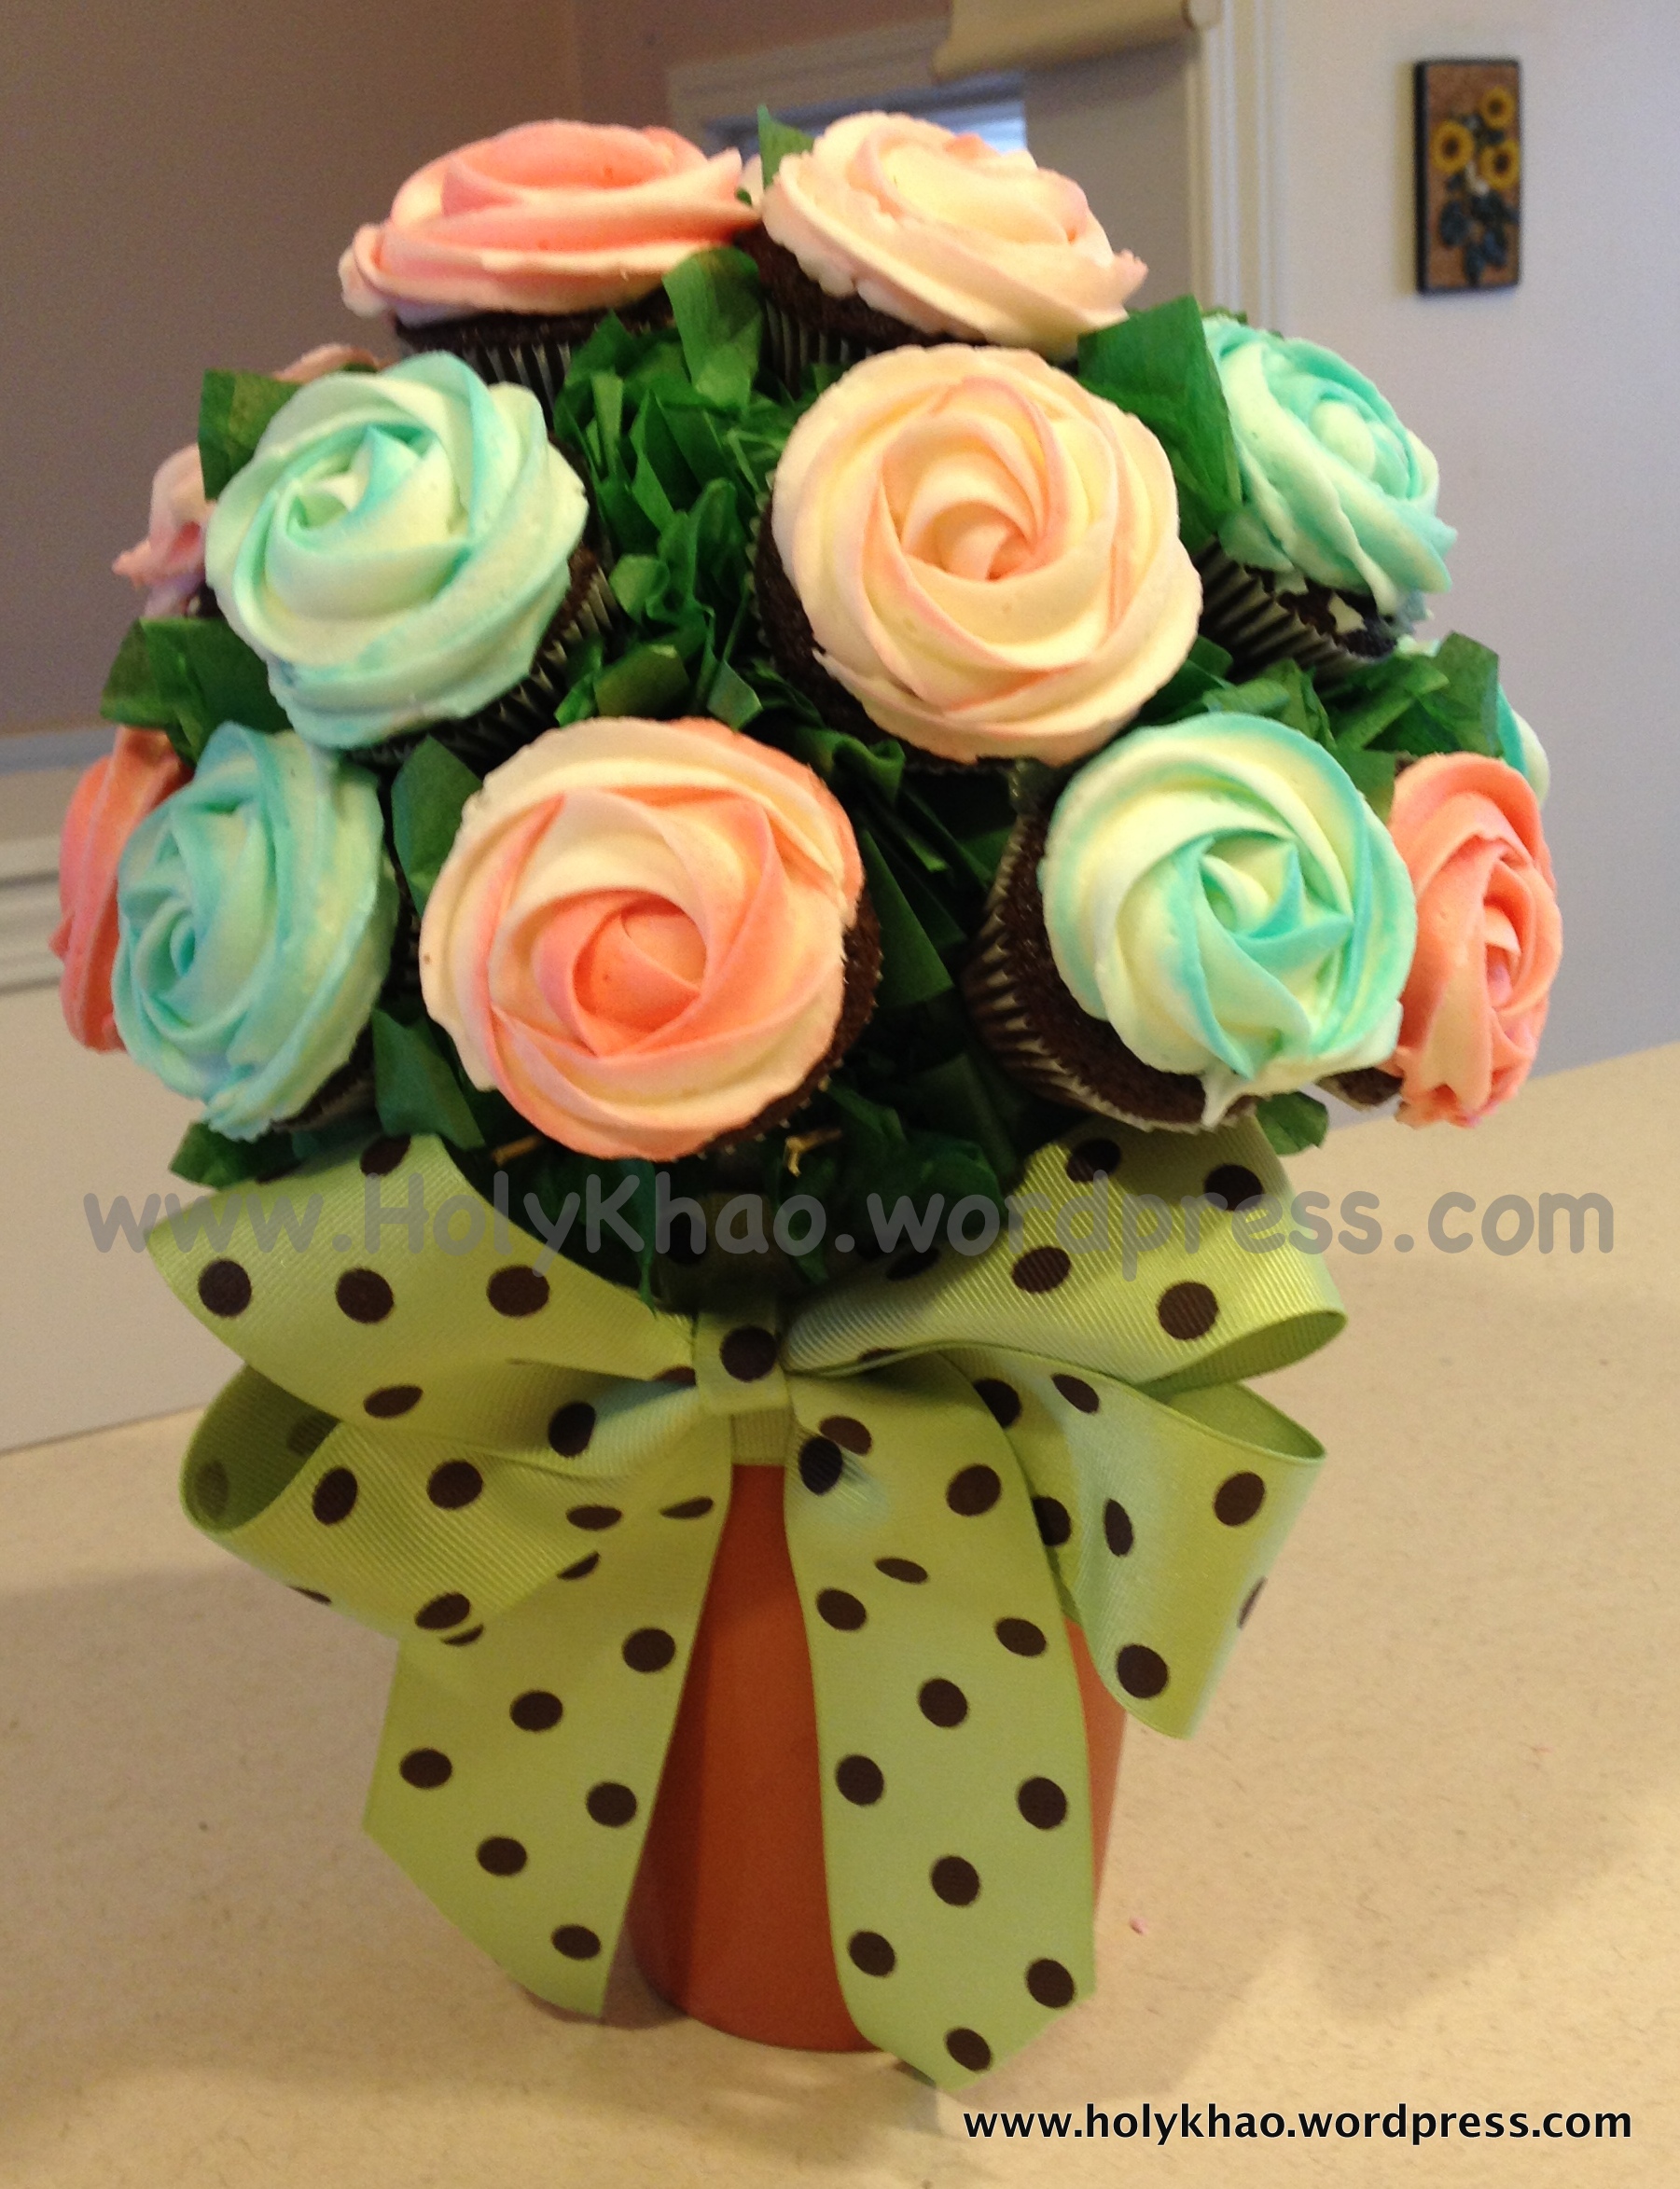


CUPCAKE BOUQUET

Cupcake Bouquet

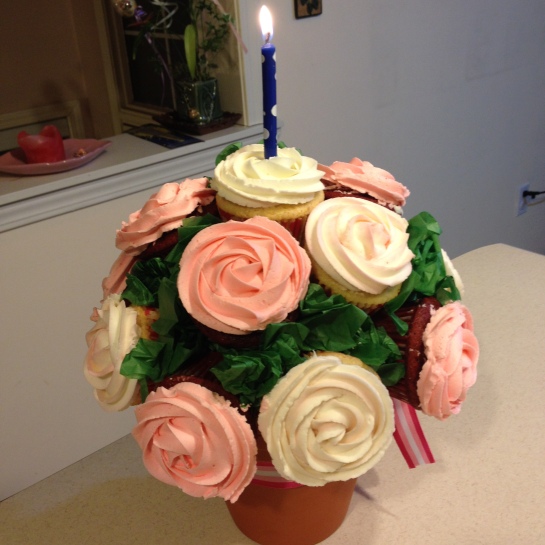
A cupcake bouquet would be a lovely gift for any occasion – Birthday, Anniversary, Mother’s/Father’s/Grandparent’s Day, Thanksgiving, Christmas, Baby / Bridal shower, Thank You, Congratulations, etc.

With Mother’s Day just around the corner, this might be the sweetest homemade gift that mom ever received.

Hannah Jaikumar from CUPCAKE DELIGHTS by Hannah was kind enough to share her method for these beautiful arrangements.


MATERIALS REQUIRED

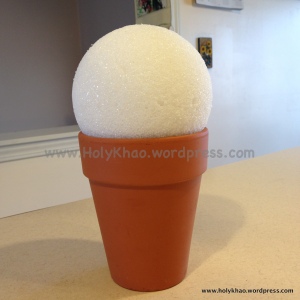
Clay/Ceramic Pot or Vase – 6-inches in diameter

Pebbles to fill inside the pot

Styrofoam Ball – 6-inches in circumference

Glue gun

Tooth picks

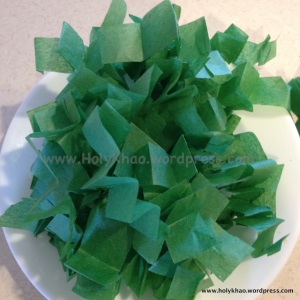
Green tissue paper – 1 sheet (cut into 6-inch X 1-inch strips)
Fancy fabric ribbon-2-inches wide (Make a fancy bow separately.)

Cellophane wrap (optional)

13 to 18 large cupcakes [OR] 20 to 26 Medium cupcakes [OR] 30 to 36 Mini cupcakes

Butter cream frosting

Pastry bag

Icing tip of your choice according to the flower to be piped


Method

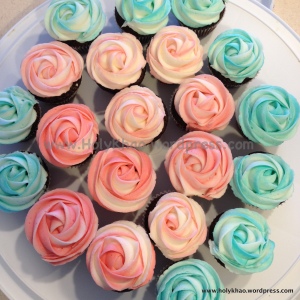
1)    Bake, cool and ice your cupcakes according to the flower of your choice, e.g. Roses or hydrangeas. Alternately, you can use store bought cupcakes.

(I prefer to refrigerate the iced cupcakes for 4-6 hours to firm up the icing for easy handling.)

Cupcake Bouquet

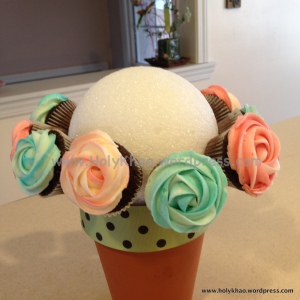
2)    Fill the pot/vase with pebbles to weigh the container down.

3)    Glue the Styrofoam ball with hot glue to hold it firmly in place.

Cupcake Bouquet

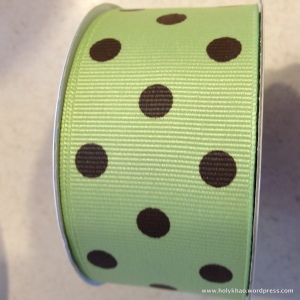
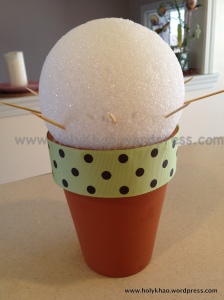
4)    Wrap the ribbon around the edge of the pot and glue at the joining. Glue the already made bow on to the front of the pot.

036

5)    Keeping the bow as the front of the arrangement, insert 2 toothpicks, about 1-inch apart per cupcake. Make sure it is at a 45 degree angle, otherwise the icing will fall off or the cupcake will loosen from the paper cup.

Cupcake Bouquet

Cupcake Bouquet


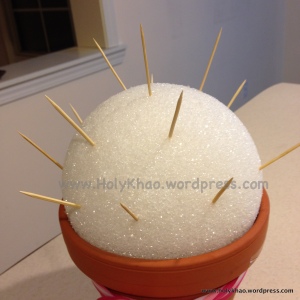
6)    Place a cupcake snuggly on to the tooth picks, right in the centre. Continue by positioning 2 toothpicks per cupcake until the bottom row is complete. Adjust the tooth picks to ensure that the cupcakes are close to each other. You might have to remove and re- insert the toothpicks a few times. You can fit about 8 to 10 large cupcakes in the bottom row for a 6-inch pot and 6-inch Styrofoam ball. Move on to the next row with the same 2 toothpicks per cupcake pattern. The middle row will hold about 4-6 large cupcakes. The top will hold 1 large cupcake.

Cupcake Bouquet

7)    If using tissue paper, cut 1-inch by  6-inch strips. Fold the strips in accordion style. Carefully insert tissue paper in-between cupcakes, making sure not to touch or smudge the icing. Another easy trick is to use a pair of forceps/tweezers to insert the tissue paper. If using edible leaves follow the same procedure. Cover as much as you can so that no white Styrofoam ball is seen from the outside.

062

 Cupcake Bouquet


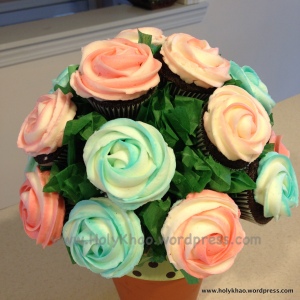
8)    Cut a large size cellophane wrap. Place the bouquet in the center and carefully gather the cellophane wrap together. Tie a ribbon just enough to loosely hold the bouquet. I usually like to give the bouquet with a few extra cupcakes just incase 1 or 2 fall off the arrangement and can be replaced at the venue.

Cupcake Bouquet


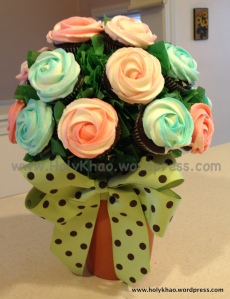
YOUR CUPCAKE BOUQUET IS READY TO BE DELIVERED


No Fuss Crock Pot Ghee (Clarified Butter)


Ghee

March 31st, 2014 is celebrated as Ugadi – New Year’s Day – in Karnataka, Andhra Pradesh and Maharashtra. It is also celebrated as Gudi Padwa in the northern parts of India. In Karnataka, the traditional sweet for Ugadi is Holige or Obattu –  and it tastes delicious with a big pat of ghee!

After numerous unsuccessful attempts at making ghee the traditional way – sometimes burnt and sometimes underdone – I have a fail-proof way to make this Indian kitchen staple.

Ghee


No Fuss Crock-pot Ghee

(About 1 1/2 cups ghee)

Super simple directions here:

1) Drop 4 sticks (1 lb) of butter in a crockpot.

2) Close lid with just enough space (enough to easily slide a dinner knife in and out – about 1/2 inch) to allow moisture to escape.

3) Turn slow cooker to LOW and cook for about 3-3 1/2 hours. (If the butter is frozen, it will take longer. I always use refrigerated butter.)No stirring required.

4) The liquid will have turned a beautiful golden hue, and scum would have floated to the top.

5) Unplug the crock-pot and allow the ghee to cool for an hour in the same insert.

6) Pour into a glass container through a fine meshed strainer or cheesecloth. Once cooled, the ghee will thicken.

7) Does not require refrigeration – Can be stored in the pantry for at least 2 months. Always make sure to use a dry spoon when using.

NOTE: I usually cook 2 lbs of butter in my 6-qt slow cooker on LOW for about 7-8 hours. I pour it into two containers, and store one in the fridge to pull out when needed.

3-ingredient Chocolate Peanut Butter Truffles

3-Ingredient Chocolate Peanut Butter Truffles

This is seriously one of the easiest and tastiest desserts you can make for the holidays (or anytime!). I made them during Thanksgiving, and it’s definitely something I will be making again. You can make them ahead of time for your dinner party, take them for a pot luck, or give them as holiday gifts.

I had to share pictures of my two hand models – my precious little nieces Jyothi & Kerah. They were paid with sugary treats 🙂

3-ingredient Chocolate Peanut Butter Truffles

3-ingredient Chocolate Peanut Butter Truffles

3-ingredient Chocolate Peanut Butter Truffles

(Makes 30-35 pieces)

  • 1 (8 oz) pkg  Semi-sweet Baking Chocolate – (8 squares)
  • 1/2 cup peanut butter – creamy or chunky
  • 1 tub (8 oz) Cool Whip – thawed

1) In a large microwaveable bowl, zap the chocolate on HIGH for 1 minute. Stir and return for 1 more minute. Remove and stir until completely melted.

IMG_7858

2) Mix in the peanut butter thoroughly and let it cool to room temperature.

IMG_7860

3) Gently stir in the Cool Whip till well mixed and refrigerate till ready to use, at least 1 hour.

4) Once chilled, scoop about 1 teaspoon full into your hands and roll into balls.

5) Roll in chopped nuts, powdered sugar, coconut flakes, crushed cookie crumbs, colored sugar, etc.